First of all, let me say I’m IN AWE of you ladies that re-do furniture. The before and after photos almost NEVER show the blood, sweat and tears of the “during”. And now that I’ve done it, I can truly appreciate all the hard work I know you gals are putting into your furniture makeovers!
I’ll get right to the good stuff…
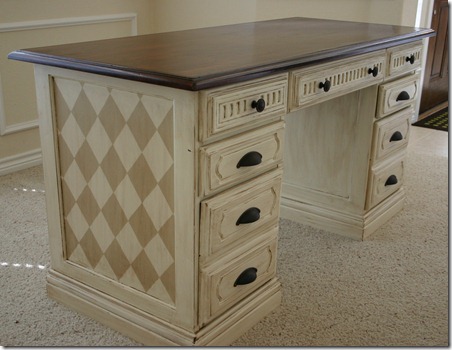
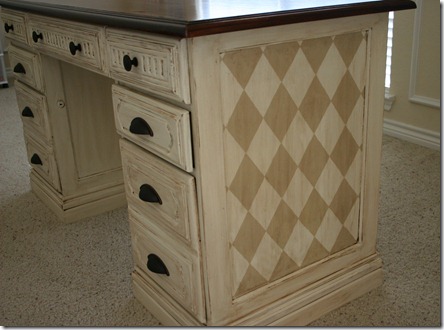
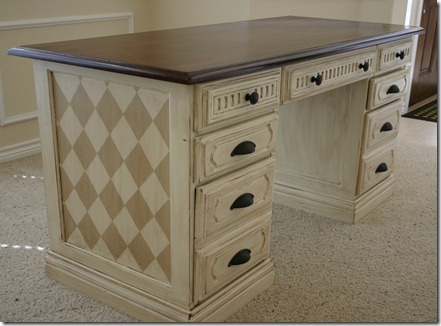
AFTER

Now for the details…
This desk was a $35 Craigslist purchase I made five months ago (May). Yes, it took me that long (it’s now October) because I made the mistake of buying it at the beginning of summer. A Texas summer, if you get my meaning. And now that the temps have dropped into the double digits again, I’ve been able to wrap up this “little” project.
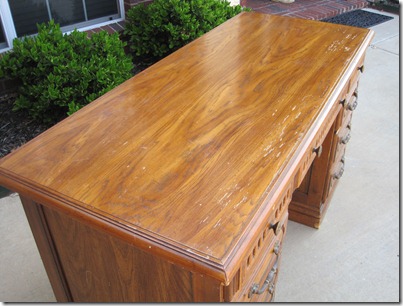
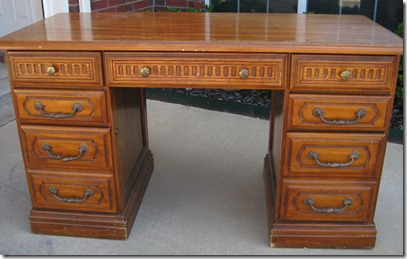
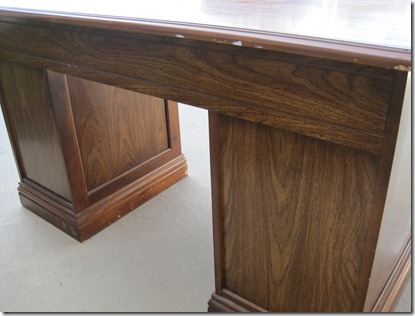
I purchased this sad looking desk for $35, hauled it home in hubby’s pickup truck, and promptly plopped it on the driveway for some “before” photos…

Pretty rough finish…there is a nail bubble in this area that doesn’t really show in the photo…


Pretty rough finish…there is a nail bubble in this area that doesn’t really show in the photo…

The desk came with broken hardware which was fine ‘cause I knew I’d replace the dated look anyway…

scuffed edges…


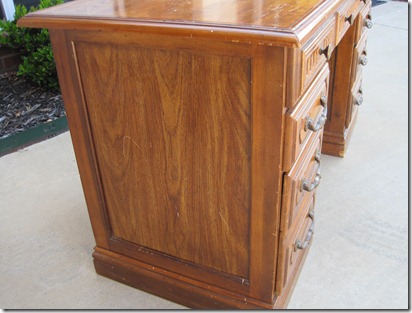
The side and back panels were a totally different kind of wood than the frame, desktop, and drawers…

The photo below shows the desktop finished (restained) and the bottom portion stripped of the original finish. It’s all ready to paint now…

Ooooh, creamy cottage white goodness…finally starting to see some progress! (Desk color = Behr Cozy Cottage in Eggshell finish)

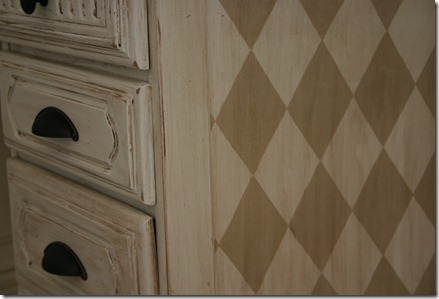
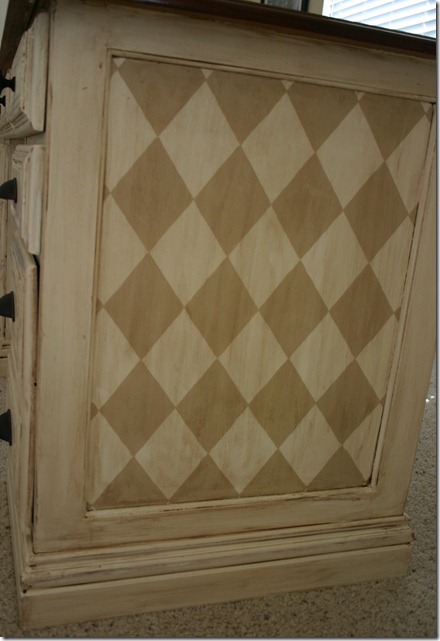
Below shows the markings of the harlequin pattern I painted on the side panels. I used a pencil, ruler, and a measuring tape. I started by marking an “X” from corner to corner and worked my way to the edges, spacing lines 3 inches apart.

I wasn’t too worried about leaving the pencil lines. I made the pencil marks pretty light, plus I knew the paint and the glaze wash would cover them up, which it did!


I used my acrylic paint brushes and went to work on the diamonds. It took 3 coats to get the look I wanted. The photo below was taken after one coat, and you can still see the unevenness of the color. (Harlequin pattern = Behr Gobi Desert in flat matte finish. I only bought a sample size ‘cause I knew I wouldn’t need much. See it at bottom of the pic?)
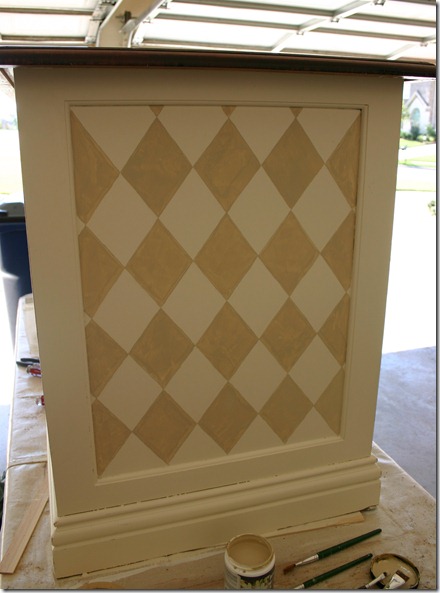
I didn’t get any photos of the “washing” technique but you can find tutorials of it all over blogland. I used Ralph Lauren’s Smoke Glaze and just brushed it on, then wiped it off. The glaze gets into the crevices (and believe me, this desk had a TON) and gives a nice aged look to the finish.


Linking up to CSI Project's "I Painted it With a Brush" party!
Linking up to Miss Mustard Seed's Furniture Friday! And
Funky Junk Interior SNS.
Linking to Miss Mustard Seed's Copy Me Challenge and
CSI's Garage Sale Finds and Makeovers!

Linking up to Miss Mustard Seed's Furniture Friday! And
Funky Junk Interior SNS.
Linking to Miss Mustard Seed's Copy Me Challenge and
CSI's Garage Sale Finds and Makeovers!


No comments:
Post a Comment